More history, turning back the crinkly pages of time, this story emerges from mid 2009. Enjoy.
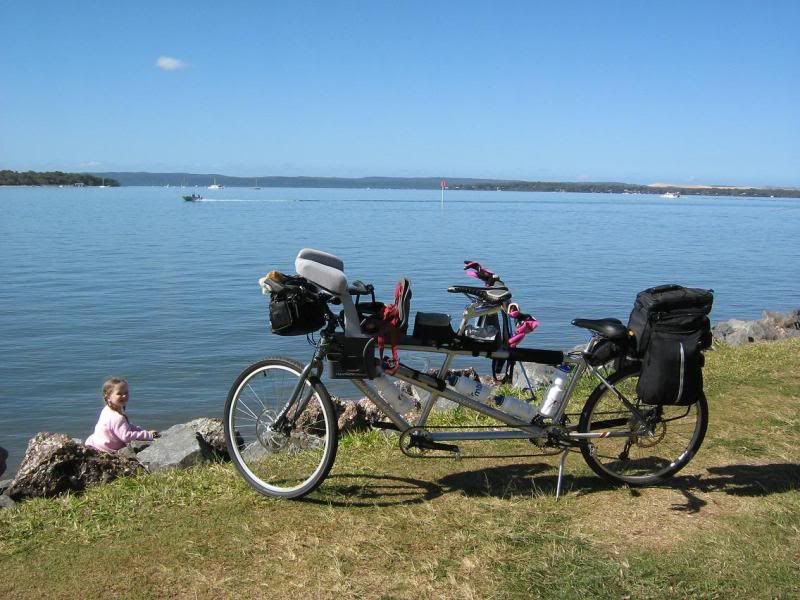
Yep, we've got one here". That was the reply down the phone. Many shops didn't have them, or had some totally unsuitable model for our purposes. You see, our bike room is full of some great bikes built for a specific purpose, however we had a growing need for an addition to the fleet, something that would extend our boundaries even further. We needed something to carry the pet monkey. We needed something to carry a heap of gear with ease. We needed something with more than one seat. We needed a Tandem When researching Tandems on the net, some interesting stuff came up. It turns out that way back in history there was a race of people called the tandemites, they apparently bred camels with two humps so two people could ride them at the same time. These people resided in a land called Tandemia. Now, apparently the Dutch expolorer Abel Tasman (who discovered Tasmania) was a distant descendant of the tandemians, hence when he found Tasmania he named the island in the native tongue 'Van Diemens Land' but also has the latin root of 'van dem' which means to go forth in two and do something constructive with your time. I guess when they wrote the latin language they left it pretty open to individual interpretation, Jean Claude should have taken note of this . We now know this island by the name of Tasmania, with some more googling I found this loose Latin translation of 'tas' meaning two, and 'mania', meaning heads. There is the connection - 2 heads on the one bike. Now if there's one thing we can all agree on, Tasmania is a great place to ride a tandem, you'll always remember it as the place for two heads. Just a basic interpretation, well according to the internet anyways... Back to the bike. Being our first tandem we weren't going to be very fussy with options, nor did we have a huge budget to blow, so a basic entry level unit would do us. A north side store had one on the floor and they were open on Sunday - 'lets go have a look' - which wifey knows is code for 'lets go buy it'. It was an Apollo Tandem Elite, with quite a few features that I liked. The fork and rear triangle will accommodate a 700c wheel with a large tyre, so I could run a second set of road wheels for daytrips, and will easily fit a 2.5 fatty for any offroad work. Cable discs give the wheel size flexibility, yet a rotor upsize is on the cards. At 18kg before any mods, it is about the same weight as my AC trailbike, and about a third of the weight of the Baby AC Speaking of the pet monkey, a critical issue was basically where to put her when we go out as a family, but more on that later...

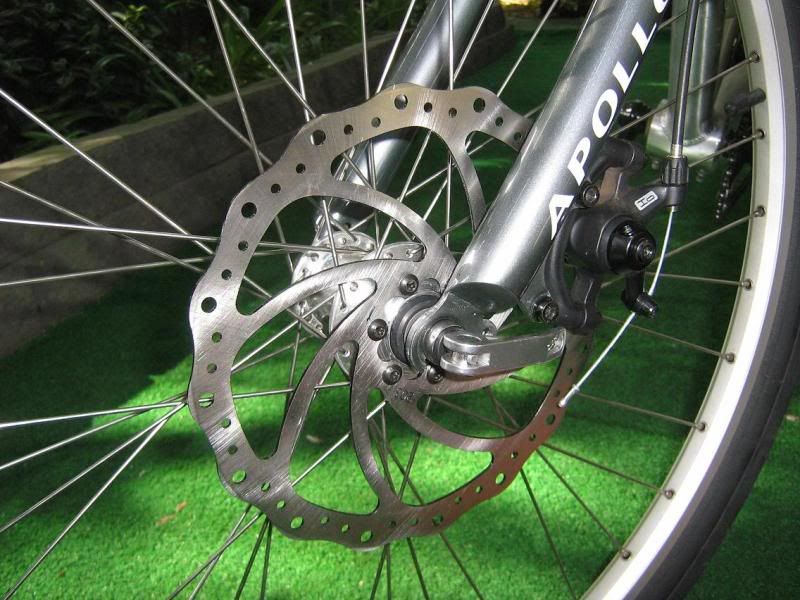
Simple, durable 8spd drivetrain, with the incredible stopping power of 6" rotors. No, really, apply the brakes and it's incredible that you stop.
Wifey reckons the shed is getting pretty full of bikes, 'Yeah, bit of a tandemic, don't you think?' was my reply. She rolled her eyes and left me to ponder on the next planned mod. Now, where'd I leave that Topeak catalogue...
Got a few challenges already, the BOB skewer doesn't like the rear rack so there will be some custom manufacturing going on there, the OEM seats are far from comfy (no surprise there), front pannier rack is yet to be decided upon and the pet monkey needs something to rest her head on.Rode the beast into the city the other day with the girls, had a couple chase us down for a km or so along the riverside, they are planning a trip in Singapore next year and had all sorts of questions."AW - you gotta get one mate, they are great fun, although riding any form of singletrack would be a challenge for many reasons - poor turning circle, strange COG, poor rampover and lack of suspension", I'm glad we have two nimble bikes for this purpose. Ha, loaded it up with the half wheeler and the whole shebang is as long as the Mav. I'm curious to see how it would handle with the halfwheeler, and the BOB attached to the halfwheeler. Self powered B-double...
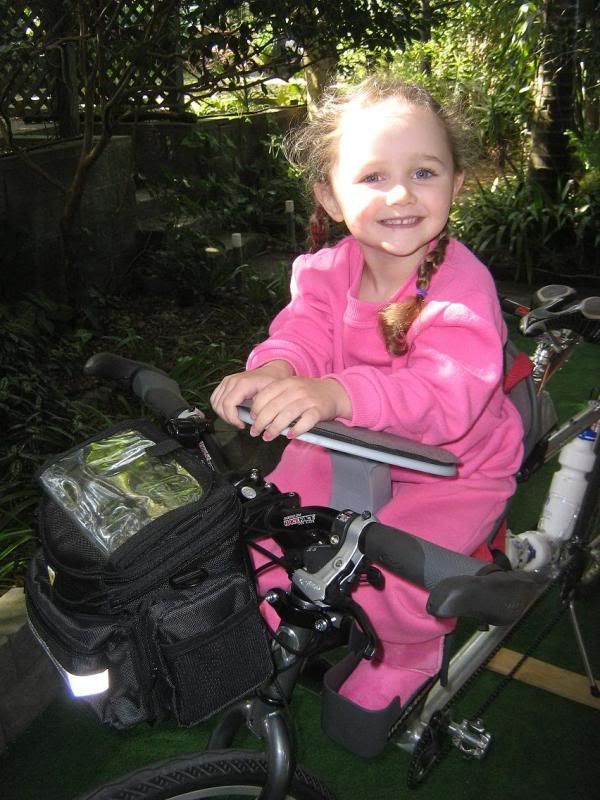
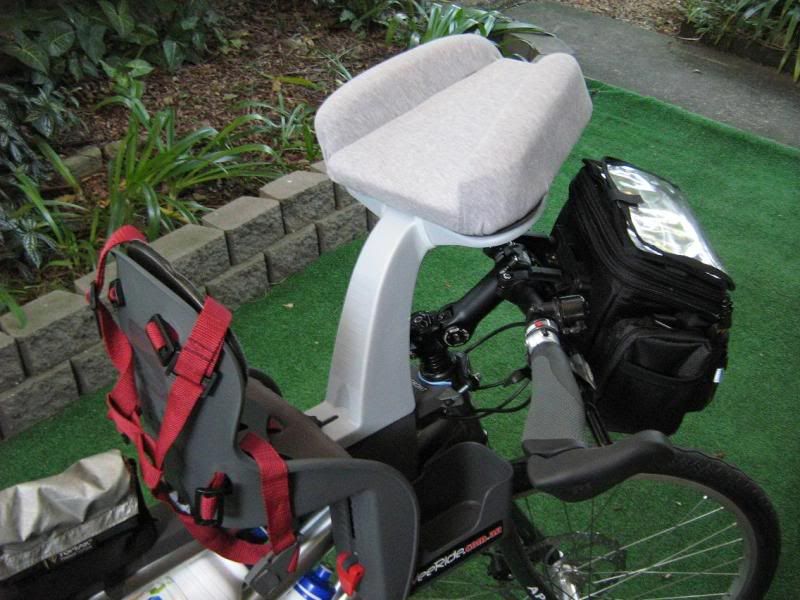
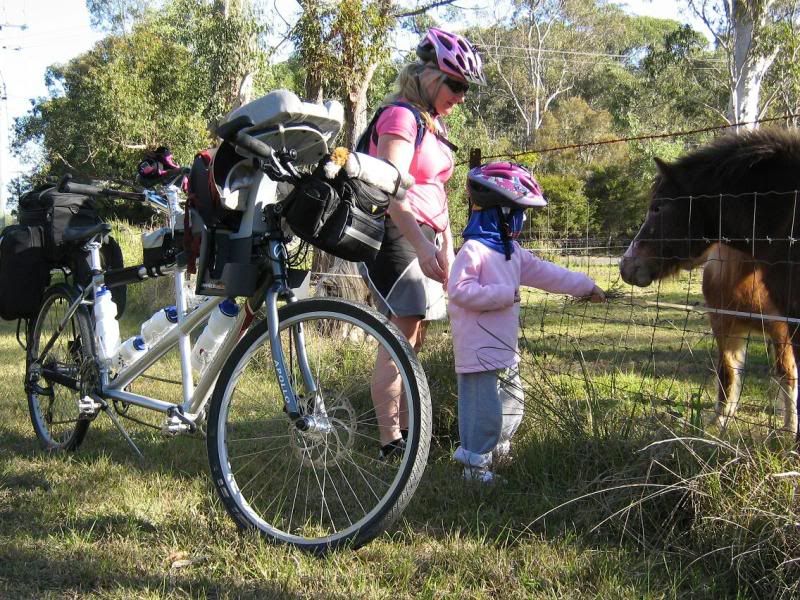
So, what has 2 wheels and three seats - from my other builds you may have already guessed - tandem with a Weerider attached. As the Pet Monkey still has a bit of time in the weerider until she is ready to go onto a half-wheeler for extended rides, she remains my little travelling buddy, my snack feeder, flower gatherer and general curious monkey. Like the other builds, this new weerider was a cinch to fit (don't worry folks, the Baby AC and its weerider are still in service) and even more comfy to tour with after a custom mod from my workshop, but more on that later.
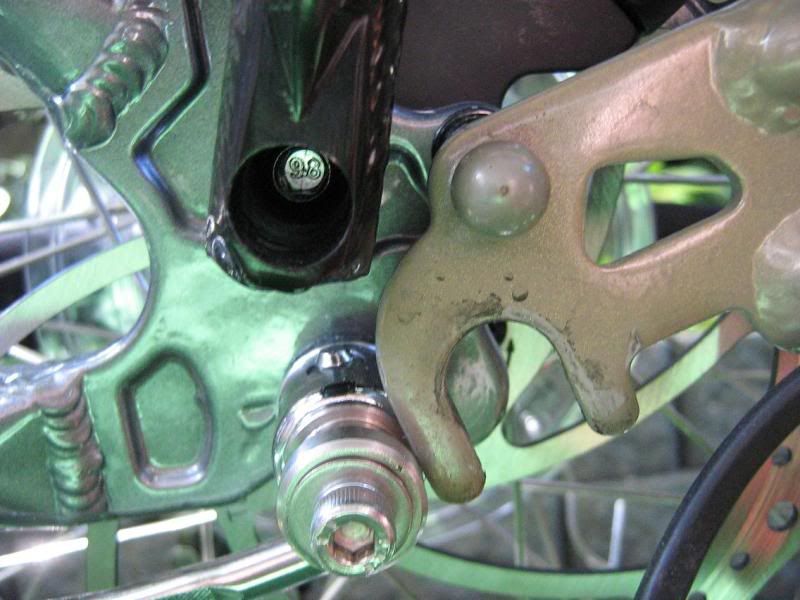
As I have mentioned, the 6" brakes were inadequate for our purposes - loaded touring with the BOB - so an upgrade was a necessity. The first stage is a rotor upsize, an 8" for the front but could only fit a 7" rotor on the rear due to clearance issues with the stays. The Tektro cable brakes will remain until another upgrade to Saints later on.
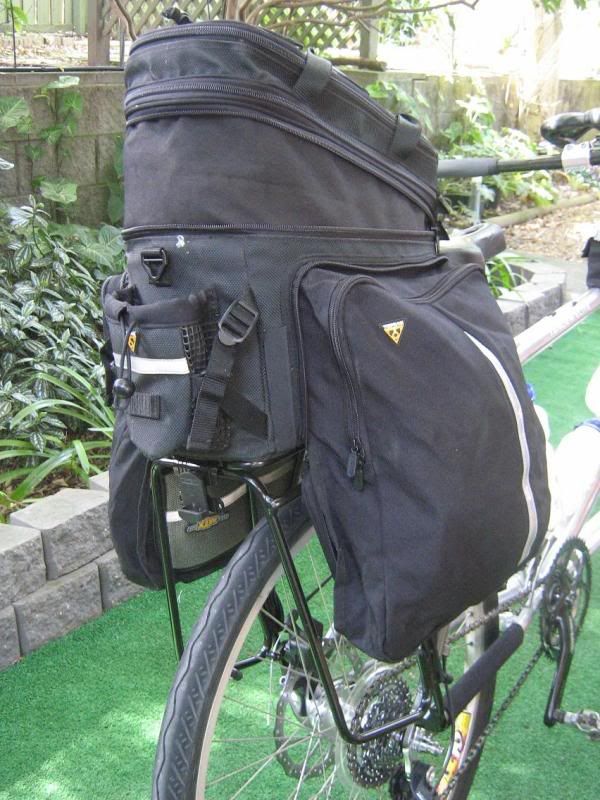
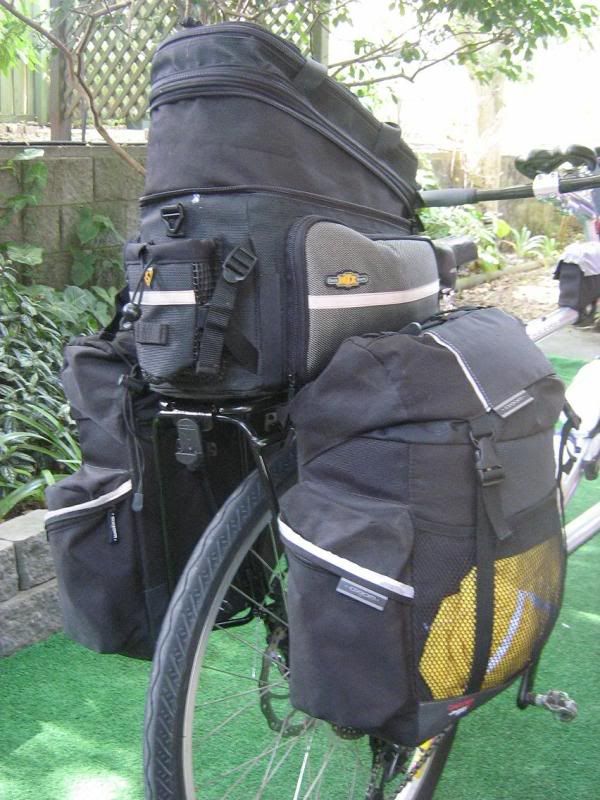
I've got the Topeak pannier rack mounted, I can use it with either the DX Trunkbag with flip out panniers, or with my larger Axiom pannier bags as this model rack has the hook bar for panniers.
Only one issue, this model rack allows clearance for disc brakes, unfortunately the bulky extension block prevents the BOB fork mounting on the skewer. I've got some manufacturing to do...
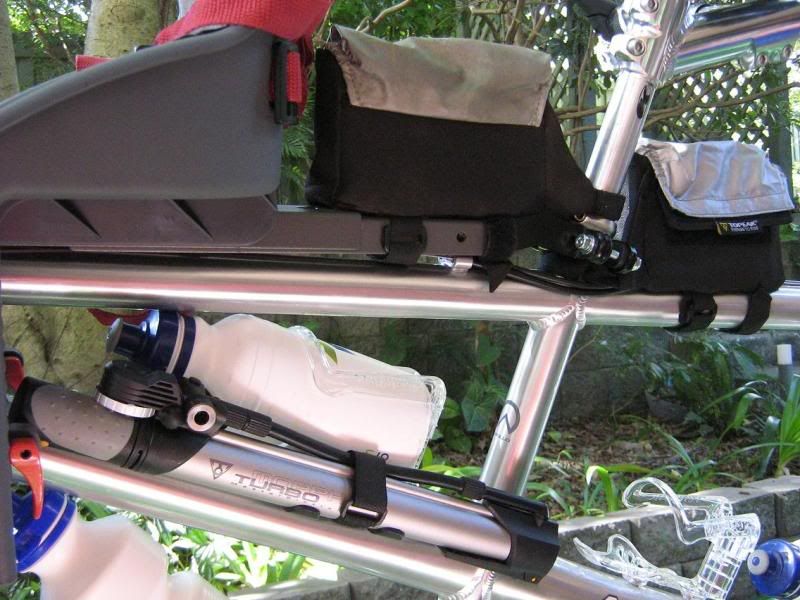
With a few more items from the Topeak and BBB catalogues the bike is almost complete - BBB ergo grips, Topeak Turbo Morph floor pump with guage, Topeak seat pack, Topeak bottle cages, handlebar bag and Tribag.
We've done a few shakedown runs now, one thing that did need attention was the gearing - factory standard granny was 28-32. With 3 on board, loaded panniers and a trailer it felt like we needed a bit more bottom end. It was off with the 28 and on with a 22, man it looks small. Also rebuilt the cassette to include a 34 sprocket - old SRAM cassettes are great to keep in the graveyard.
The pet monkey isn't getting any smaller, with all the bushwalking/running/jumping that she does her widdle wegs are getting wonger by the week. The head tube of the bike is short, the fork crown height is pretty low and the stack height is around 35mm, so my bars were pretty low. On went a BBB 130mm adjustable stem and this corrected my position and gave the monkey plenty of wegwoom for now and the future. She's 15kg so still has plenty of time left in the seat, just no room if she wants to bring home a boyfriend from college :)

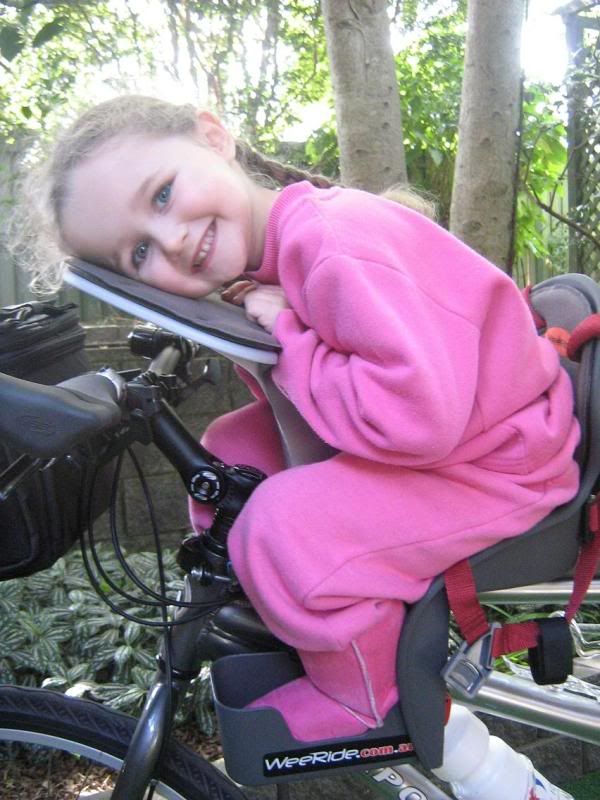
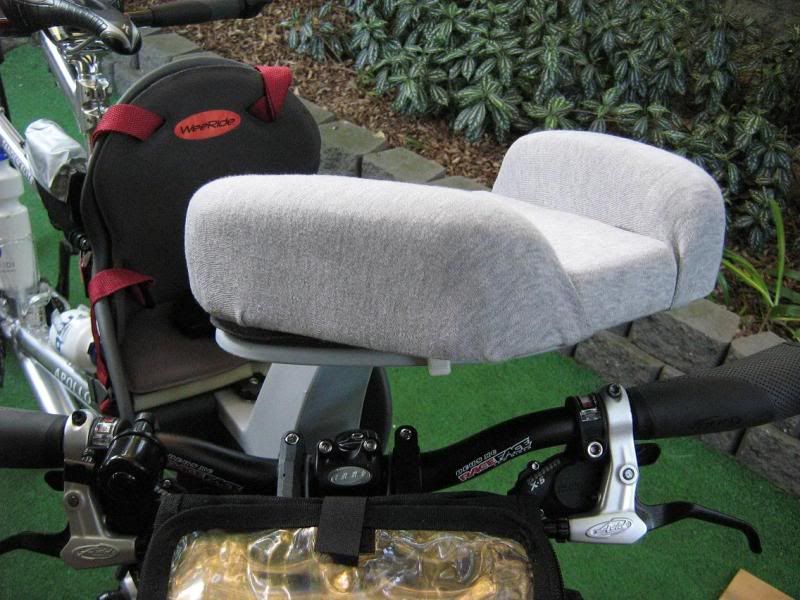
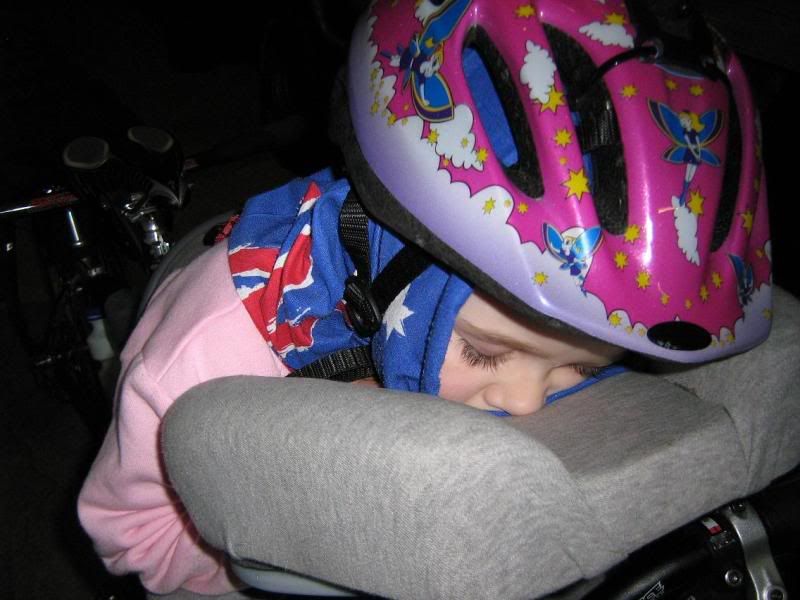
Which brings me to the new mod - the Baby AC sported a pair of bars for her to hang onto for singletrack, on this build she doesn't need to hang on so tight, the premise here is long days in the saddle with her sleeping whenever she wants. Anyone who has had a fully relaxed sleeping child on a weerider knows that they are just a big floppy thing sliding off left and right. If you can control the head, the body will follow suit. Well, it works with horses. And snakes. Apparently.
So into the workshop, my favourite part of the house. It's my domain, where I can make lots of noise, make stuff from other stuff, be a guy, watch whatever I want on the plasma, scratch, fart and basically be the master of my universe. Full of some really cool toys and tools - stuff that can take off an arm in the blink of an eye and some real noisemakers too. Yep, bloke heaven. So, by harnessing the power of the universe, keeping my fingers away from the bitey bits of the machinery and having the odd scratch - I made up a little cushion for the pet monkey to rest her head when she has a sleep. I should have made one of these years ago, but it took a while to get the power of the universe connected to the shed, all sorts of balanced encabulation issues - I won't bore you with the details - anyways it works a treat. Pet monkey loves it.
I'm sure she remembers every bit of the days ride...
With Wednesdays off I get the chance to make progress on the tandem. But first I get to spend a bit of time with the pet monkey before we ride to daycare. We colour in, talk about world news and current affairs (I had no idea she knew so much about the commodities market) and watch a bit of Play School. Occasionally we fight over the red Playdoh, but we sort it out - I find sulking really works. It's a good routine we have, she likes the pattern we have and throws the best tantrums when the routine is broken - should have some really good video for her 21st...
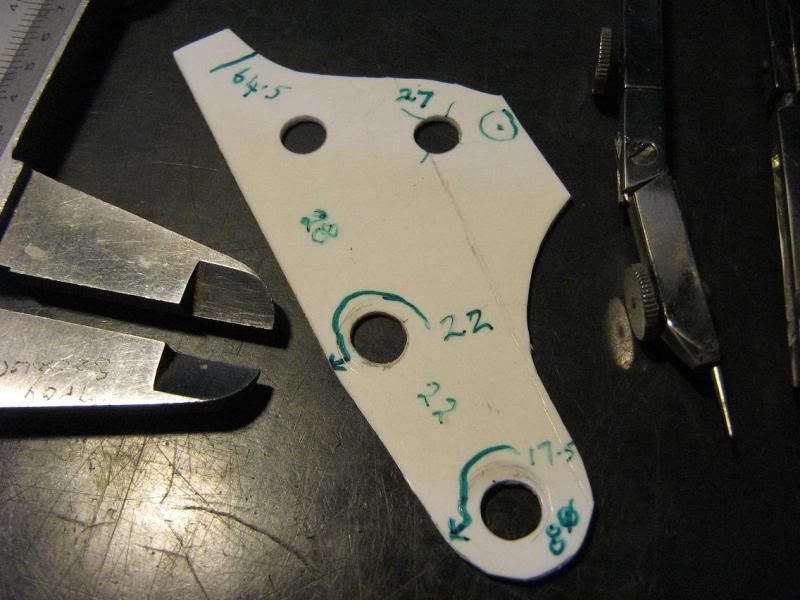
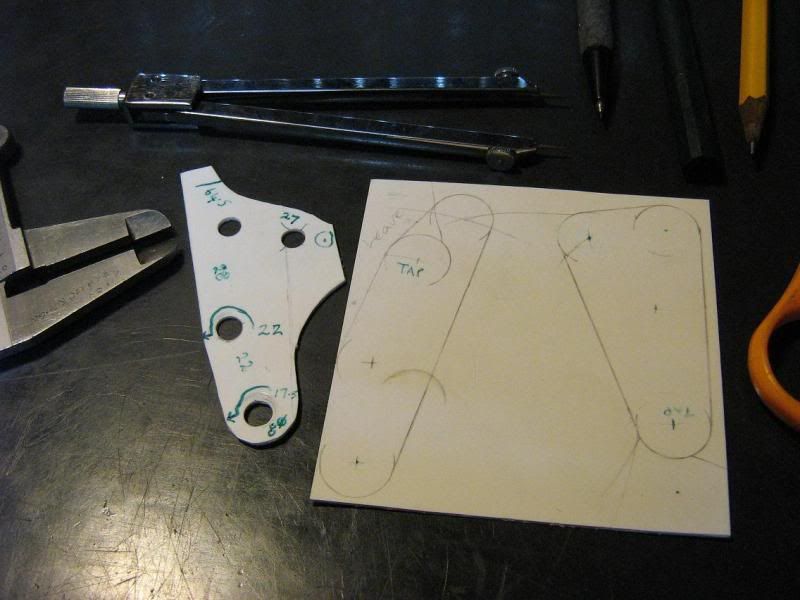
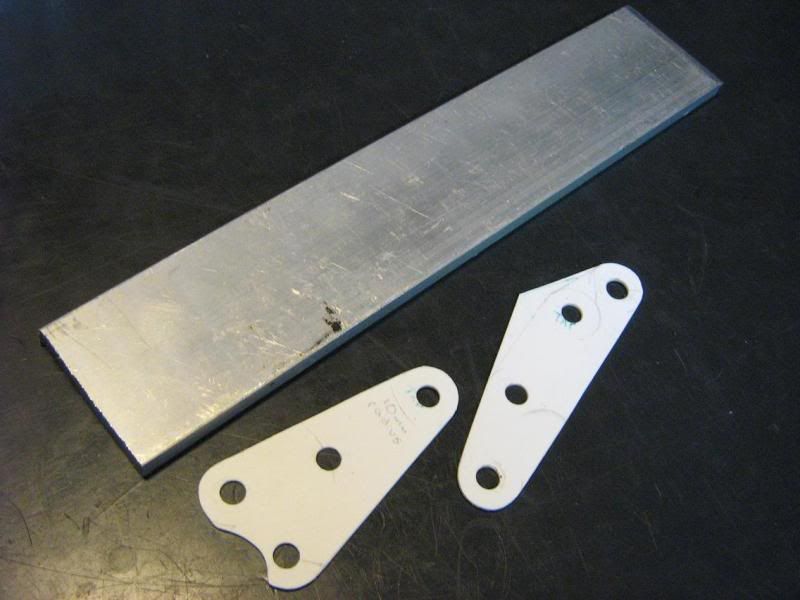
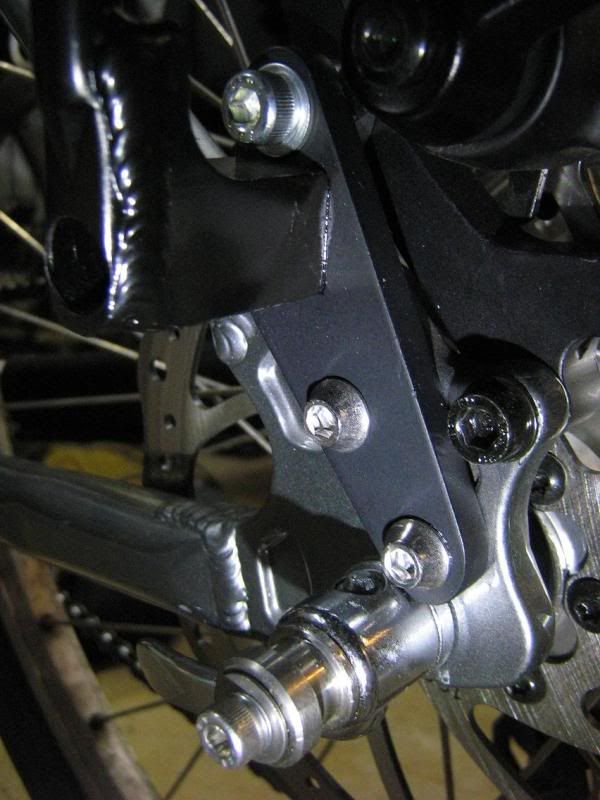
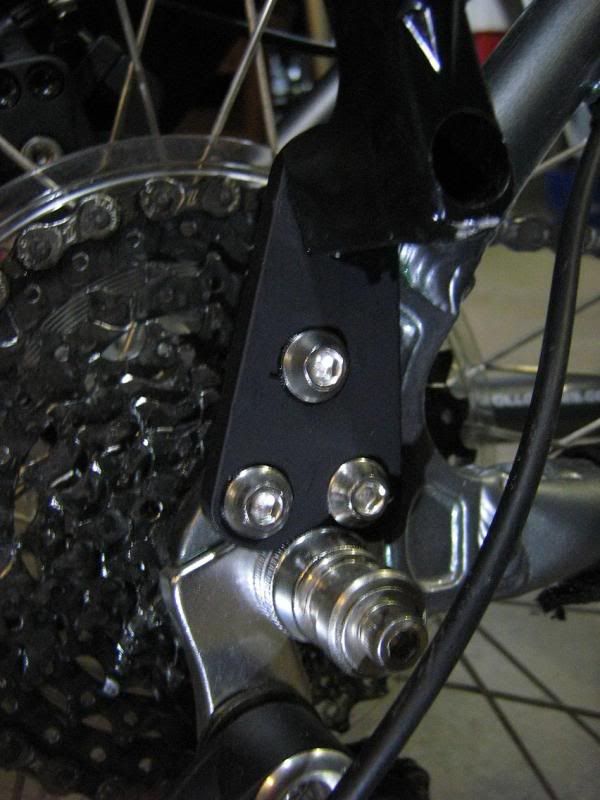
Which brings me to the next project on the tandem, fitting the BOB. The Topeak rack fouled on the fork of BOB so some extension plates needed to be fabbed up. Instead of hacking into some alloy stock with reckless abandon, the job has to be carefully measured and planned out, taking into consideration the travel path of the BOB fork and clearance during coupling and decoupling among other points. Once measured, I made a rough pattern out of 2mm polyethelene, rigid enough to hold the rack in place yet able to be cut with scissors and machined with ease. I can adjust the pattern with accuracy and speed, ensuring zero wastage of my alloy stock. A second pattern is made once the spacings are confirmed, this becomes the accurate template for reference, but I still mark out the alloy stock from scratch instead of transposing lines and drill marks.
40 x 6 alloy flatbar stock
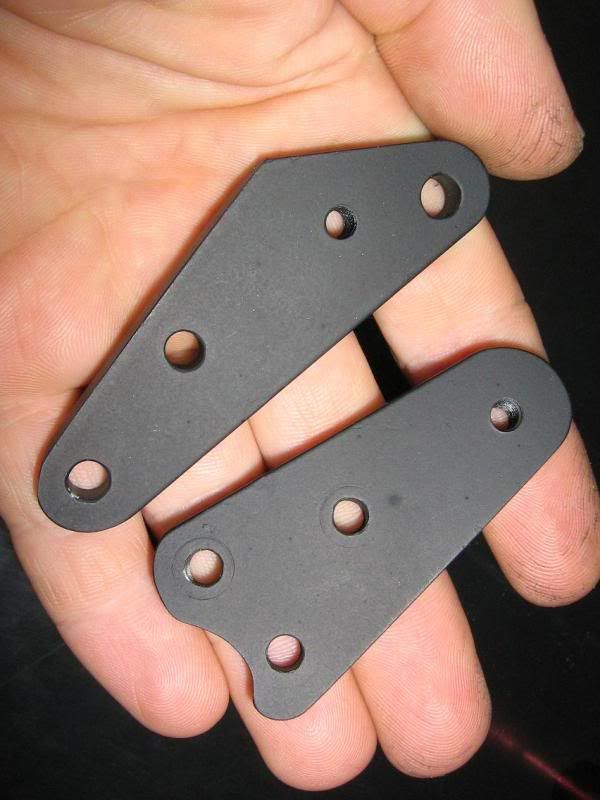
All shaping by hand, rough out with a bastard cut, drawfile smooth, arris the edge.
Completed product, etch primed and shot matte black.
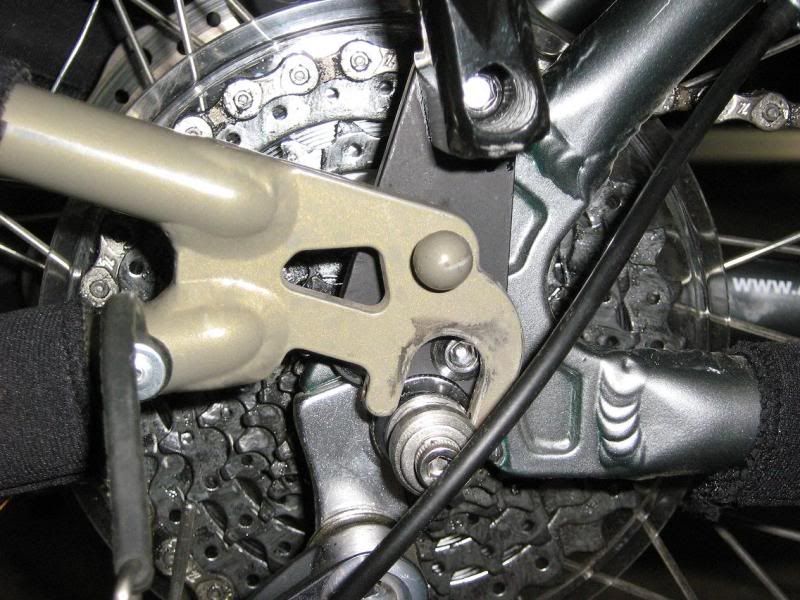
The top bolt mount on the non- drive side uses the top brake tab bolt for reinforcement, whereas on the drive side I tapped the derailleur hanger bolt and used that for mounting.
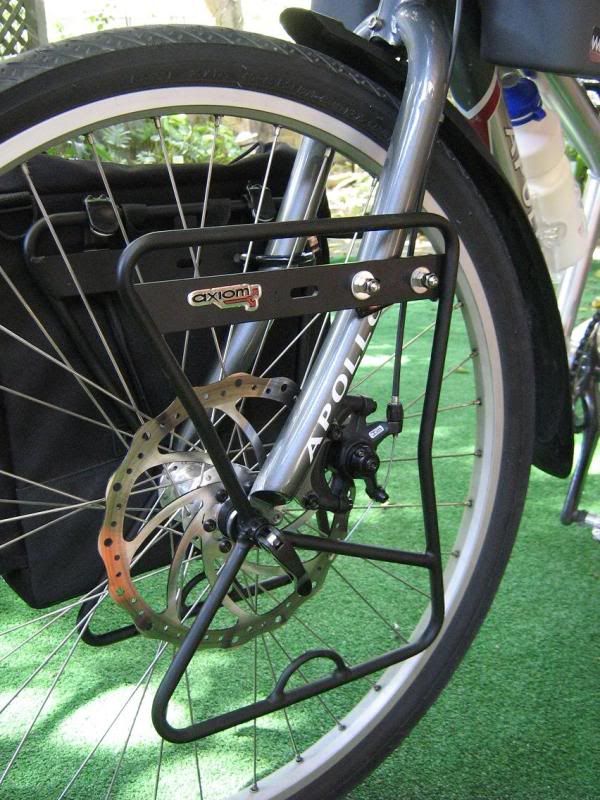
So with the rear rack sorted out, turn the attention to the front rack. An Axiom Odyssey rack sorted the front end panniers.
The cassette also had some surgery - it was an 8 spd 11-32, but it somewhat 'lacked in size down low' - it needed an enlargement. I keep all my old parts and found a worn 9spd 11-34, split off the 34 and replaced the 32 on the 8 spd. The slight thickness difference of the sprocket didn't matter as it is on the outside of the stack. SRAM cassettes are easier without the alloy/riveted carriers as with Shimano.
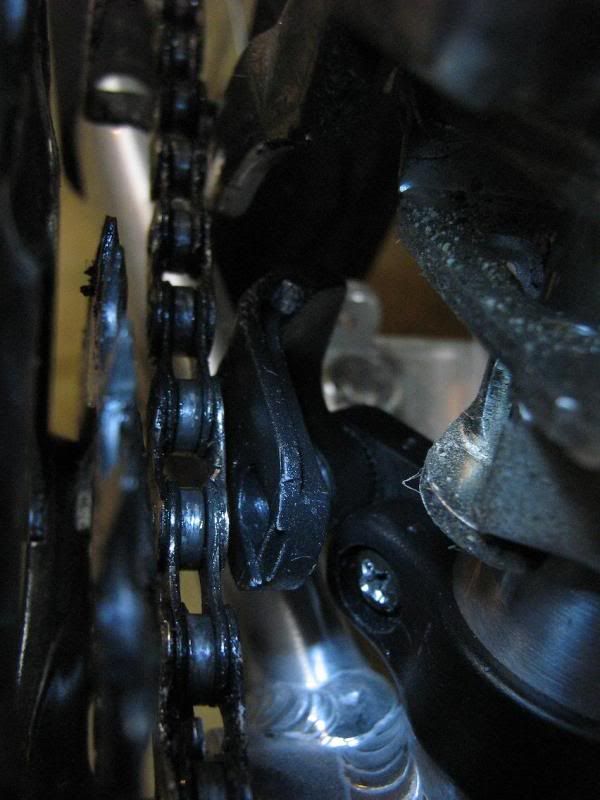
Upon road testing I found the change down from the middle chainring to the 22T a bit too much of a drop and a few dropped chains were the result. Limits were set correctly, I even had a few times when the chain would not drop - I blame it on my stoker not backing off when I change - it seems she has selective mind reading abilities :)
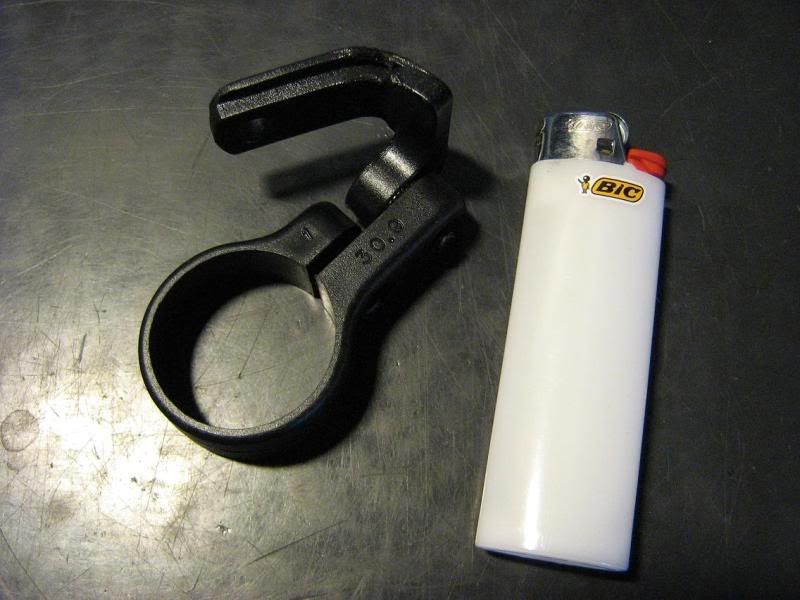
I can get hold of chain guides/dog fangs easy enough from suppliers, but I was running short on time due to an upcoming trip - I needed a solution now to dropped chains. I scrounged around in my parts bins and found the perfect donor part, with a bit of modification it would do the job perfectly.
It's a front reflector bracket to suit oversized bars, made of thermomouldable plastic. Using my Belgian made heat transfer tool, I re-aligned the molecular structure of the transverse plane to reflect the angular requirement - or in laymans terms I bent it to shape.
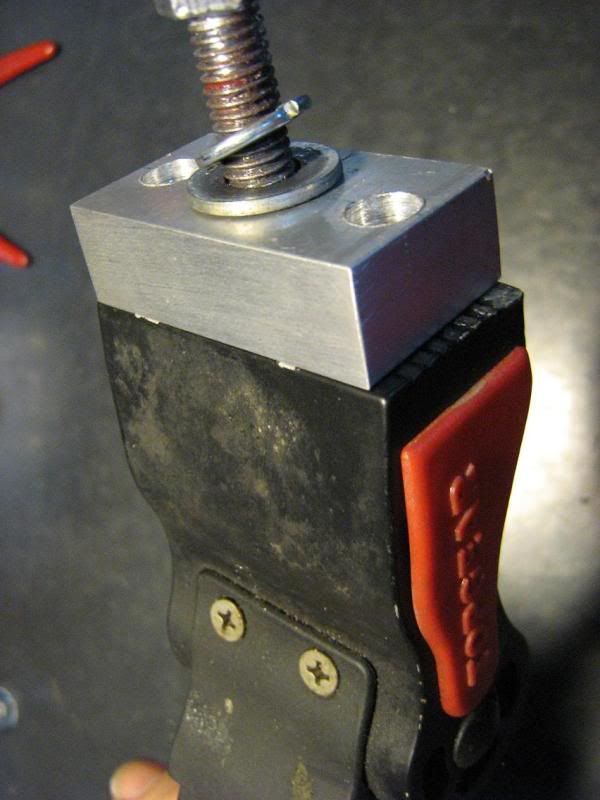
I swapped out the stand from the commuter (Goldwing) but the chain rubbed in certain gear combos. Fabbed up a riser block out of some 60 x 12 flatbar stock, countersunk some M5 capscrews to secure the block.
With a few shakedown runs I was certain the OEM Innova tyres were not up to the task of loaded riding. With a pressure rating of just 65 psi, with them inflated to the rating it left no room for the natural increase when loaded. They were just too squirmy, plus with no real puncture protection barrier. Punctures on a loaded tandem are best prevented than repaired. I've always been a fan of Vittoria tyres, talking to the distributor at Ausbike reinforced this as they have a passion for the quality of their tyres.
The Randonneur is a gem of a tyre and had the features I needed - puncture belt (doubles as a wear indicator), pressure rated to 95psi, reflective sidewall, all in a 26x1.5 package. You can get a folding bead without the reflective sidewall.
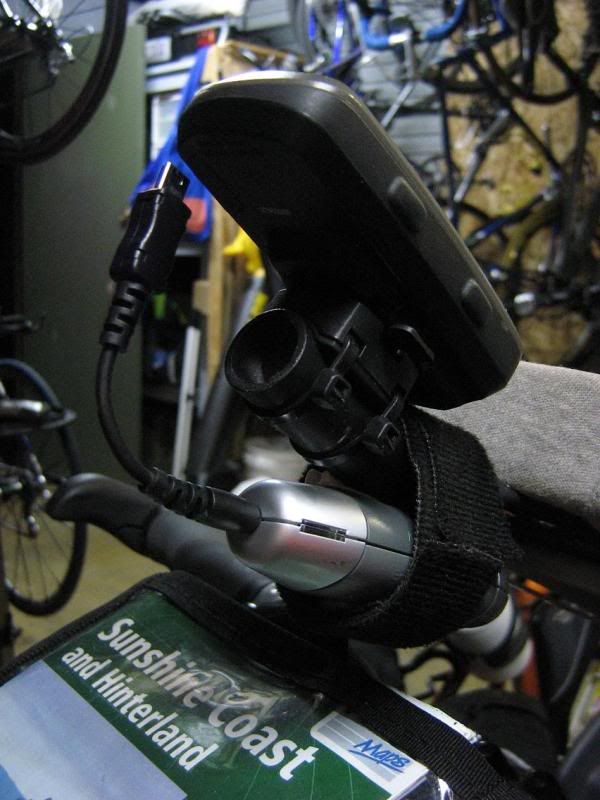
I can barely see the gear indicators with the Weerider fitted, so fitting a computer on the bars would be futile. I still needed trip data though, and Wilson needed somewhere to sit to stop him whining (you'll have to read my SoCal adventure to know the Wilson story). I bent up a piece of conduit and screwed it to the bottom of my custom Weerider headrest, Wilson and the backup battery pack are highly visible now. He's a bit of an attention seeker so it suits him to be prominent.
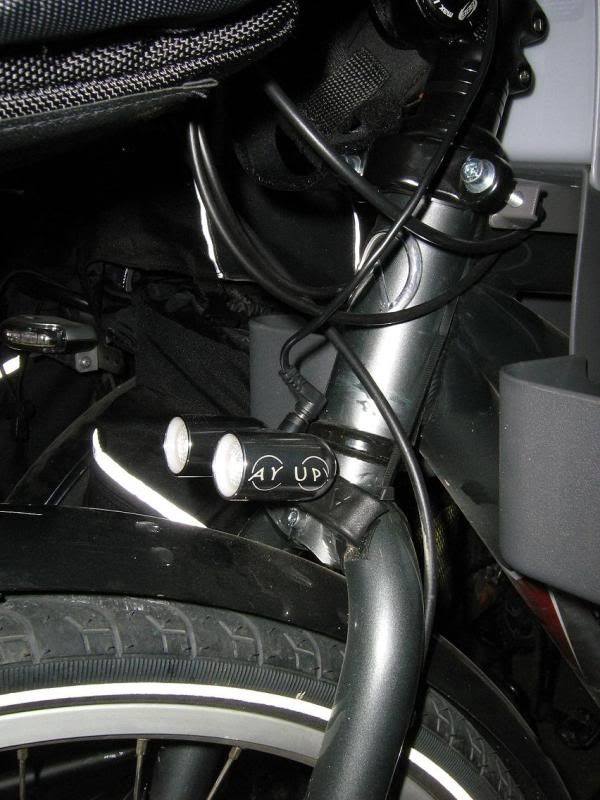
Lighting, hmmm, where to mount? With so much stuff crowding the cockpit, this was the logical spot for the Ayups.
That's about it. For the moment anyways. Bike is ready for the trip now, the report for that will be appearing soon...