Showing posts with label iditabike. Show all posts

Friday, 16 August 2013

Iditabike camp - humpday 3

 
Camp was going exceptionally well - we were getting to know the lay of the land, our knowledge and confidence was increasing, as well as our situational awareness and respect for the semi-arctic environment we were in.
 
 
I've never been one to sleep in. All my life I've pushed the sleep boundaries - never getting enough because I want to pack so much into every day. ITI camp was no different, I wanted to get some pre-dawn photos on the lake and just enjoy the solitude.
 
 
Out on the lake I followed some trails and sloughs to the SE of camp. I had a few hours before our 9am group rendezvous. 
 

My regular tripod got damaged in the flight, so I MacGuyvered a makeshift UL version - my mini Joby, on top of an alloy tent pole (from my Contrail tarptent) jammed into the snow. Not great in any slight breeze, had to bracket the shot below for pot luck in getting a shake free long exposure.


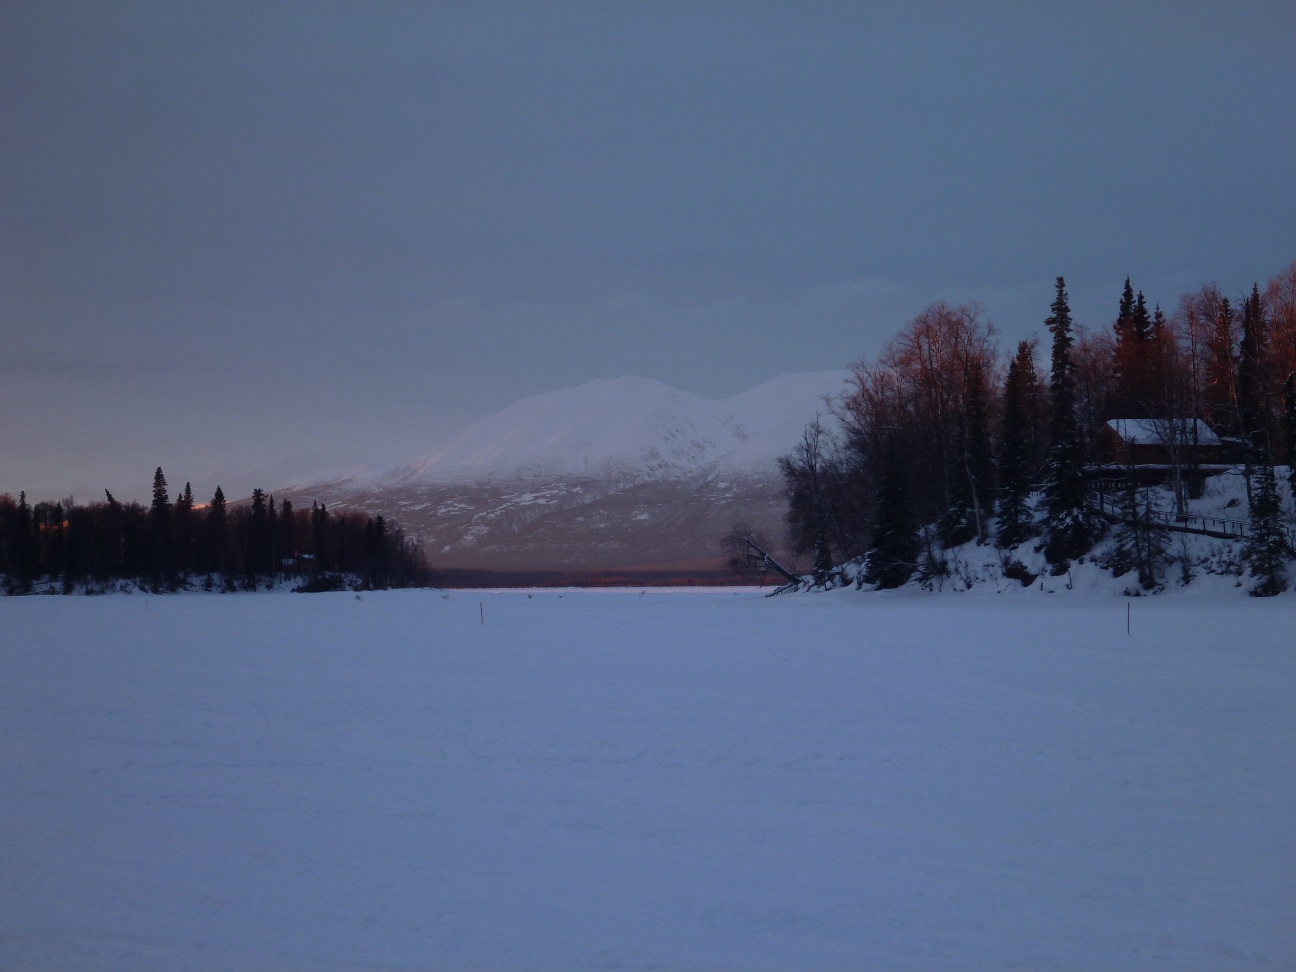
It's amazing how much your eyes and brain compensate colour balance. What you may 'see' as white light, could be hued or tinted due to atmospheric conditions or ambient light sources. One of the many first things you learn as a photographer/videographer is white balance - correcting and sometimes using a false reading to your advantage in camera, instead of manipulating the image in post production. It's a real treat when the image is exactly how it was.

 
Kurts cabin overlooking Flathorn lake and Mt Susitna was a great base for camp and is also a checkpoint during the ITI. Many thanks for the hospitality!


Our first class today was tyre changing. Now I'm very experienced and well qualified to change tyres, however changing a flat fat, in the snow, in sub-zero conditions, was a new experience for me. Bill handed over the class to me, my mate Rob shot some video of the demo. I had a ball, and I hope everyone took away some new knowledge - sometimes the tiniest tech-tip or trade secret could get you out of a bind. So Bill, have you used that paintbrush in the bidon trick yet?

 
We all put our bikes back together and got moving. The plan was to head out over the lake, cross the dismal swamp and pick up a snack at the churro stand. Okay okay, there was no churro stand - should be though, calories come in handy...
 

Dismal swamp and a fair share of firm overflow, great fun riding with non-studded tyres - slippin' an'
driftin' an' fallin' an' hurtin'.


 We stopped on the edge of the swamp to practise bivvy, cook/melt and repack again. By now, things were falling into place and the routine getting faster each time. I was refining my SOP, updating my diary and methodically logging what worked and what didn't... but in this pic I'm just taking a break to enjoy the moment.


Stickboy showed us his skills in making a fire from the basics - birch bark. The oils in the bark assist firestarting - even when wet.
 

 Spruce on the left - shelter, bedding and needles for your tea, Birch on the right - bark for your fire. The birch reminded me of our own aussie Maleleuca (paperbark tree) and a quick scan of Wikipedia revealed some amazing uses for Birch.

 
We rode over the rollers till we got to the Susitna river, then we turned back towards base camp.


The return leg to basecamp turned into a bit of a TT, was great to open it up on the trails with a familiar destination. I got back and was sweat saturated (on purpose) with just my long sleeve Icebreaker shirt on - I wanted to go through the process of drying out wet clothes on body during motion. Amazing how much heat your body can produce! Bill gave us an optional solo navigational exercise - the directions were cryptic and fairly basic - "Out on the lake, turn left, then right up one of the sloughs, loop through some backcountry and come out on the track you rode in on, before you drop back down onto the lake again. See you when you get back." Love it, this was just what I was after - off the leash and up for a bit of freestyle exploring. Sun was just setting on the treetops as I left.


I came across an area of the lake where some guys had been ice fishing. I spent half an hour picking up the trash they left behind - candy wrappers, used hand warmers and general trash - filled a 10L trash bag and took it with me. Felt a little sad that someone could show such little respect.


Back on task, I turned up the slough to find a decent patch of overflow. The surface was slick and still a bit greasy in places - meaning a fresh flow and not quite frozen. Hmm, and not waterproof to the knees either. I scouted it, confirmed my line along an existing snowmachine track, poked it with a stick. Satisfied, I pinned my ears back and went for it. Nothing happened, but it was a valid learning experience - made me think more about traversing long, deep, slushy crossings and what I'd need in the future. Mental note to update SOP and equipment list.


Nirvana. Narrow, buff singletrack disappeared into the spruce forest. The trail meandered through the prettiest country I'd ever seen. Easily the best bike ride of my life.

 
Along with remaining spatially aware (I had no maps, relying purely on dead reckoning for direction - no need for the compass yet) there was also the situational awareness. I spied plenty of fresh animal prints on both sides of the trail - moose included. The distinctive heart shaped, cloven hoof print crisscrossed the trail.


My journey took me through some incredible backcountry on the original Iditarod trail, some twists and turns, and back onto a trail I recognised as the one we rode in on Monday. I rolled down the steep bank back onto the lake trail and startled a moose off to the side, a safe distance away. First moose! I now know what it feels like when tourists see their first kangaroo or koala.

 
 By the time I got back it was late, found I was the only one who fully navigated the exercise. Sleep debt was starting to mount in a few of us, and with it warm and dry in the cabin, Renzo was the first to succumb.


Sunday, 7 April 2013

Muru Witjira fatbike build for the Ultimate Adventure - Part 2

Ah, there's nothing like that feeling of 40+ hours travel time, aisle seats, double helping inflight meals, 4 airports, toting a 25kg backpack, towing a 23kg bikebag and the indignation of almost having to strip naked for each airport screening check. The TSA never repack your stuff the way you like/need it...

So, yes I arrive in Anchorage, Alaska, 99508. Catch a taxi from the airport, "Where are you going?" asked my Indian taxi driver, in his Americanised Punjab accent. "Cottonwood St, mate" I replied. "Yes very good, but which end?" he questioned. Before he had answered, I remembered the length of streets from previous US trips, and how they can sometimes span whole counties. My maps were in my pack. In the trunk of the taxi. It was 12F below. I remembered what the B&B looked like from the website picture...but it was a summer picture. No problem, "I remember what the house looks like" I enthusiastically added. We turned North off 36th and 2 minutes later I spotted the B&B:


Home for the next few days before camp was the Alaska European bed & breakfast. Awesome place to stay - homely feel, good neighbourhood, good riding closeby and public transport a short walk away for trips downtown. Most of the stuff I needed was only about a 40 min walk each way.

In part 1 of the Muru Witjira build I referred to the D.E.D. tours and the build parameters, but there are times when you gotta bend the rules. So when it came time to start wrenchin', would you choose to build the bike here at 10F below (8:30am):


Or in here at 18F:


Yeah, I thought so. Soft. Whatever, I don't need to justify myself. There's plenty of time ahead to harden up to the cold, but underneath that fluffy snow was a half inch of ice, making it slipperier than a butchers door knob. Moose were about too.

So here's what came outta the bikebag:
  •  Salsa Moto Ace bars - I like the 17 degree bend and it gives a lot of clearance for the levers to any harness or handlebar bag system
  • SRAM X0 2x10 gruppo with twisties - I like the higher shift cable tension to overcome contamination and the simple mechanism of twist shift 
  • BB7 brakes - I like the ease of adjustment and field servicibility of mechanical disc brakes
  • Selle Italia SLK saddle - my butt likes this seat
  • Ritchey Comp seatpost - I like the sturdy alloy post, especially for heavy seatbag usage
  • Crank Bros Mallet 3 - I like the ease of service, needle roller bearings, big platform, studs and open design for snow clearing
  • Extras - Blackburn Mammoth pump; bag of bolts, washers and spacers; Surly ultralight tubes
  • Lubricants - SRAM Johnnisnot cable grease, Motorex 2000 grease, Morgan Blue extra dry silicone chain lube, MTB Mechanic Bike Butter PTFE grease
     

...and here's what I had to build it with, a Topeak 19 and Leatherman Charge Al (brain, eyes, mouth and right hand also used during build):


About this point I discovered the TSA's repacking efforts had bent the rear rotor - mouth was used for swearing at this time of the build. No prob, I was heading downtown anyways to catch up with the team from Speedway Cycles to get a few things. Intermittent snow showers, icy conditions, still a novelty to this QLD'er - the view down Northern Lights Blvd:
 
 
Look to the ENE and you see the shrouded and snow-capped Chugach mountains.
 
 
 So much fat. Just like the fixie is to New York, fatbikes dominate as the main bicycle transport in Anchorage at this time of the year. Keen eyes will spot a picture on the wall of Adventuruss on his 10 desert solo expedition. 


I upgraded to a 180mm rotor and adaptor, picked up some boots and tyres I had on order, as well as some light pogies and a large Revelate pocket. The boots were my plan B, I had bought some Lake 302s and Berghaus supergaiters months prior to the trip, but just wasn't happy with them in a few ways, when compared to the 45NRTH Wulvhammers. Turned out to be a good choice.


The 180mm rotor was going on the front, first MacGuyver challenge of the day was to space over the front caliper adaptor 4.?mm on the Swale fork. This generation of Swale fork used a front offset IS mount (basically to suit a regular 100mm OLD front hub rotor offset), but the Hope Fatsno 135mm front hub uses a rear rotor offset, so the caliper was sitting too far outboard - you can see the caliper mounting bolt threads.

 
Hmmm, digging through my bolts and spares I found some M5 bidon cage spacers, perfect.

 
I'd like to say I bored out the hole to M6 using a corkscrew off the leatherman and a modified electric toothbrush MacGuyver style - but no, there was a battery drill and bit set in the garage. I had to hand-mill the thickness of the spacer down a fair bit, the leatherman had a file for that job. The tips of my fingers went numb for a week after holding the spacer against the file.


Cables were lubed up with Ride Mechanic Bike Butter. 


Next challenge was the front derailleur. Remember how the cranks were off my Moonlander? Well, the Surly MWOD Moony cranks are a full 10mm further outboard than regular fatty cranks, to clear a monster BFL on a Clown Shoe. My mistake was that I grabbed a spare direct mount front derailleur bracket from my spares, but it was to suit a Mukluk and regular fat cranks. The X0 front derailleur was stretching to shift into the big dog, so I drilled another hole in the bracket, shimmed it with 1 washer at the top and two on the bottom bolt to angle the cage out. Ghetto, but it worked, no other option as no Moonlander front derailleur brackets were in town.


Tidy up a few loose ends and the bike was ready to session. I chose non-studded tyres, the durometer of the Husker Dus is matched well to the snow conditions so traction wasn't too bad. First ride was in the snow and ice on the road - the plan had come together.
 
  
On another trip to the US a few years ago, I built another bike specifically to suit that trip. Trip was in California, hitting up as many mtb trails up the west coast, I built up a Santa Cruz Blur - and the first ride on that bike was on US soil at Montana De Oro, just a short drive from Santa Cruz. I really dig the symbolism of that and the adventures I have with my bikes are priceless.
 
This trip was many things - I have been waiting for several years for all of these events to be close enough together to attend them on the one trip: Iditarod Trail Invitational (ITI) training camp; DT Swiss Certification course at UBI in Oregon, Park Tool Tech Summit (my 4th) in Portland; a 10 day solo backcountry bikepacking trip through central Oregon; and to help justify it all - it was an age milestone birthday. I even slotted in a Monster Jam event while in Portland, but nowhere near as good as the last one I went to at Anaheim Stadium a few years back.


The tyres measured up at 102mm on the Darryls, you can see from the pics there is plenty of room to fit a BFL, Nate, Bud or Lou if that is your flavour. More details about the specs and measurements on the frame and fork are available at Muru Cycles.


Lay out all the bags and fittings for the camp, then time for a ride on local trails to settle in the mechanicals.


Pictured from top left and working clockwise: Revelate Viscacha (large volume rackless seatbag) with 2 Spockets (mesh pockets) attached; Revelate Harness (fit to handlebars to carry drybag and Z-Lite) with large Revelate Pocket and another Spocket; Dogwood Designs Pogies (you store your hands in them); Salsa Anything Cages with OR bottle cosies (for 1L Nalgene bottles); ghetto fabbed silver drybag to cover the MSR fuel bottle on the downtube; Revelate Gastank (for toptube near stem) Revelate Jerrycan (toptube next to seatpost); Revelate custom framebag (fits in frame front triangle)


The Muru Swale fork has lugs for mounting bidon cages, or these 3 bolt Salsa Anything cages. Great for tents, sleeping pads - light bulky items. The bottle cosies are Outdoor Research items (I don't rate them highly), holding 1L wide mouth Nalgene bottles.


Viscacha seatbag is cavernous (not holding a lot in this pic) with very well thought out strapping and support. MSR Whisperlite stove in neoprene bag, 5 days of rations, 2 nesting titanium pots, a spoon and a first aid kit all inside the bag, with a small silnylon tarp in a stuffsac strapped to the top.


Main custom framebag (originally made for my titanium Fargo) has binoculars, handtowel, toiletries and other important stuff in the top section pocket Lower pocket has spare tube, tools, spare bolts, zip ties - basically a mini shed. Jerrycan (toptube/seatpost) bag has camera batteries and SD cards, chemical handwarmers. Gastank (toptube/stem) has electricals - lights, brackets, bits of velcro, Power Monkey battery, headtorch, other stuff. Silver bag on downtube is covering the MSR fuel bottle, in a s/steel bidon cage.


Front on view of the large Pocket, for gloves, headgear, bulk snacks, other stuff. Behind this is the Harness that holds a large drybag for sleeping bags (2) outer layer clothes (Primaloft pants and jacket) VBL socks, down vest. Not pictured is the Z-Lite pad, this was in front of the harness and the straps for the pocket formed the mounting method for this. Basically it was for the lightweight, bulky items.


Cockpit. Pogies for hands, lollies, snacks, batteries for lights, chemical handwarmers. Osprey camera bag for matches, bulk Powerbars/Clif bars (must be defrosted inside jacket pocket for at least 4 hours before consumption). Exposure Diablo Mk4 light. Garmin 800.

 
Poor little 800, it took a beating. After a while it didn't want to play anymore.


There were still a few days until I set out on the Iditarod trail - time to explore a bit around town, fall over on the icy roads, test clothing and enjoy the surroundings. I'm falling in love with Alaska...


Saturday, 9 March 2013

Muru Witjira fatbike build for the Ultimate Adventure - Part 1

Years ago, before the internet and social media and pet monkeys, wifey and I used to do a lot of 4x4ing. Monster trucks, hardcore wheeling and rockcrawling was a growing scene, I subscribed to a few offroad magazines made from paper (remember those?), excitement would build when I received the latest Petersens 4 Wheel & Offroad mag.

Two annual events they (Petersens) hosted in the US was the Ultimate Adventure (20 or so handpicked heavily modded 4x4s would tackle hardcore trails inside a week) and the D.E.D. Tour - the basic premise was two staff would ship their tools and a set of tyres to some small town USA, they'd fly in, buy some old beater 4x4 from the local wrecker, wrench on it in the carpark, then drive the truck back home seeking adventure, hardcore trails, and Dirt-Every-Day (hence the D.E.D.)

This stuff appealed to me. But how could I replicate that in bicycle mode? Easy, but I needed to build a rig for the ultimate adventure and D.E.D. tour I had planned - Alaska Iditarod trail and backcountry central Oregon.

It all started with a bunch of bolts. Seriously, before I had anything remotely fatbike orientated, I gathered the bolts I'd use for the build, I was so excited. Bolts. Yeah, the build had started.


But let's rewind a bit here. There is a back story that should be told, because a few people kicked out the stops to make this build a reality. I was planning on taking my ti Fargo for the Oregon section and borrowing a Pugsley for Alaska. But over the xmas break, an opportunity from Muru Cycles planted an idea that got me thinking about taking a titanium fatbike over. Timing was key - the frames were still being made as the weeks turned to days before I flew to the US. I quote an email I sent to the Muru team before I left:

"Hey team, I wanted to take the time to be serious for a moment and pen a word of thanks.
Thanks for the opportunity to take this bike with me on this trip, I can't begin to fathom the amount of work in the background that happened to enable the frame to arrive today. I truly appreciate it. When I look at the frame and fork, it delves down deep into what I really wanted out of an adventure companion and fatbike. Bikes to me are something special, not just mere bits of metal. I see character, personalities, needs and potential. Each of my bikes go on adventures of their own - they have stories not unlike my own, as without each other there is no adventure, so they share my trips like a faithful companion. And then, when stored back home, I can visit my bike room and reminisce on the trips we've shared, and plan future trips over mountains, across streams and into the wild blue wilderness.
I will do my absolute best to capture the moments on camera, to give you some great marketing material, both still and motion - tested in the harsh Alaskan winters and on Oregon singletrack.
A big thank you to all involved in getting the frame to me. Looking forward to the build... :)"
 
Want a tissue?

In following the tradition set by the D.E.D. tour, my dream envisaged flying in with a bunch of parts in a bikebag and building the bike in a hotel room, a driveway - wherever - and then set off on an adventure. This is part 1 of that dream...

I worked closely with the team from Muru on frame/fork lead times, timeframe was tight but confident it would arrive in time. I had a good build spec in mind, one that had a blend of lightweight and beef parts for essentially what was to be an expedition bike. Bars and stem arrived, a donation from fellow fatbiker Kedan.
 

Woohoo, so many presents to open.


Hope Fatsno hubs, Holy Darryls, black DT comps, prolock nipples.


I didn't fancy building these up in Alaska.

 
A little detail of mine when I build wheels (for 25 years & certified DT Swiss master wheelbuilder), is this industrial grade label with build details - spoke tension, length and type etc. Also helps when packing spares for a trip, you can identify immediately which spoke to grab.


The delivery times were spot on from Muru, they tracked them from the factory to my door, communication was excellent. The frame and fork arrived Tuesday at the shop, I flew out to the US next morning, just enough time to fit the essentials...

 
 Frame is machined very well. Grit-blasted finish graphics are a nice touch - this frame is very unique in several ways - the way the wording was layed up on the seattube, and the fact it was going to be the very first Muru Witjira built in the world. I got very little sleep that night, wrenchin' an' packin'.


Racklugs. Fender mounts. Tripod mounts. Streamers. Whatever you use them for, the design team at Muru have included more of what you need, less of what you don't.


Mid blade cage mounts on the fork, ideal for bottle cages or Salsa Anything cages. Or streamers.


This I really like - replaceable derailleur hangers. This style of dropout is unique to the first generation of Witjira frames - second gen will have a different design to incorporate the rear brake within the rear triangle.


The headtube runs a 44mm I.D. zero-stack headset (that's the wordy explanation of the term ZS44) and I plan to run 2 forks on this bike - the ti Swale fork for expeditions; and a Lefty for singletrack fun and short missions (more on the lefty upgrade to come). Headset cups pressed in one at a time with copper antiseize grease.


Nice new blade carves the ti steerer on the Swale fork, just like Nans' roast dinner. Including the metal bits too - Nan sometimes confused roast beef with roast potatoes and would wrap them up in alfoil - Pop didn't argue with Nan so he'd just carve it anyways with the electric knife...


Starnut smacker-innerer.


I rebuilt the BB cartridges and installed some new FSA ceramic hybrid bearings (FSA Ceramic SB24377) into the MWOD Andel cups - as you can see the old ones were running a bit rough. By-product of fun.


I had to use the cranks off the Moonlander (Surly MWOD - offset double) as the cranks I wanted weren't available. Chainline was not optimal, but this wasn't immediately apparent, until part 2 in Alaska...


Ready to go into the bikebag.


 That's it for the build in Australia. Part 2 starts in Alaska...